I’ve been using electrolytic rust removal for quite a while now, but this method never ceases to amaze me!
Here’s how I found the chuck, it came with a milling machine I acquired a few months ago, the previous owner had left some tooling in a rotten shed and this is the end result.
I was willing to bet this chuck was trash, and I was ready to throw it away. However it turned out to be an older type Jacobs, it was also a size I didn’t have… So I gave it a try, what can we lose right?
It was frozen shut. In theory the electrolysis should not affect the inside portion of the chuck, because it isn’t in the line of sight with the anode — but I had my hopes this could just work by freeing up the rust near the jaws and the collar.
Surprisingly after a few hours the chuck was in working order!
Sadly it’s been abused (more than we thought) and it won’t center within spec anymore, however it was quite an interesting experiment nonetheless!
I did remove the arbor later on, not sure how they were using it like that, the inside of that arbor is hollow and threaded, but it has no surface to register with, aside from the flat face on the hexagonal portion — odd, maybe it was meant to be screwed onto a turret tool blank for a capstan lathe?
So there you have it, you CAN turn your archaeological finds into usable tooling, assuming no apes were previously involved.
I kept getting stiction and rough surface finish on my lathe, in a way that I couldn’t pinpoint exactly, until I decided to begin lapping and hand scraping parts on the lathe, to improve it. Prior to a thrust bearing upgrade, among other things. Turns out the saddle clamp (which is held by 3 capscrews on my lathe and it’s simply a machined bar of cast iron with a slight angle to it) had a terrible surface finish, a quick blueing showed it was only making contact on both corners, but no contact anywhere else.
I quickly decided to degrease it, strip the paint and begin the lapping process starting with 80 grit all the way up to 600, with good cleanup in between grits (very important). In the end I had a relatively reflective part with at least 80% of contact area against the flat surface I was working with.
This is great, since we previously established almost no contact by comparison, and a very rough shaper machined surface with deep imperfections.
Once cleaned, dried and oiled, I proceeded to reinstall the part on the lathe, making sure I only adjusted the screws enough so I wouldn’t see any deflection on the dial indicator as I pushed the saddle up with quite a lot of force. Any more torque on the screws would only be detrimental, as it would increase drag with no real added benefit.
In the future I plan to replace this part with a custom machined bronze one, which I believe will perform even better.
Sadly I didn’t take any pictures of the process, but rest assured you will notice a huge difference, specially on the feel of the saddle and the surface finish.
My theory behind the improved surface finish is simply that the previous imperfections were making the saddle tilt ever so slightly, this tilt was amplified by the distance from the toolpost to the pivot, decreasing the quality of the surface finish and of course, in turn, less rigidity was observed previously due to the low contact area.
I stopped lapping at about 80% contact, there is in fact a point where “too much” is “bad” in terms of stiction, also, slight imperfections allow for oil to be retained and carried, without the need of machining oil grooves.
Even better would be to lap the rear bearing surface of the bed, to this now flat part. But, that would take a lot of time and right now I’m happy with the results, so hopefully you’ll try this out and let me know how it went, remember only a small amount of metal is being removed in the process, we’re talking less than a thou typically, unless your part is pretzel shaped…
Given the lower friction and flat surface on the clamp, the saddle now feeds and feels a lot better.
The next “mod” will be to lap and hand scrape the cross-slide, including the gib strip, which is very rough from the factory. I’m doing these improvements slowly, because you can always continue what you were doing later, after you tried it out for a while. Which I feel is the correct way to go, to avoid potentially expensive mistakes.
MonoPack is a simple, comprehensive, lightweight and portable pipeline oriented sprite / texture packer for web, game and software developers alike.
Right now MonoPack is a console-only application, oriented to streamline game and website development pipelines. It’s nature allows it to be automated via batch and scripting engines very easily. It is, as well, completely free for commercial and non commercial projects (contact me for more details)
It’s “page” oriented, meaning it will iterate through a given directory, including all matching images into the final atlas. It does not take into consideration sequential images (animations) nor grouping yet.
It’s always the same story, either the available tools are too slow, cumbersome or have multiple dependencies, they may be free but not functional or prohibitively expensive… The available commercial tools are fine but they’re on the slow end of the spectrum with features most devs will never need and so many lacking important features on their “free” versions that render them virtually useless.
The output is always 32bit with alpha channel (supported if your sprites have them, otherwise it can generate the alpha mask given a color-key, see the configuration file for more information or leave me a message and I’ll try my best to guide you).
Current output formats are:
PNG (32Bit)
BMP (Bitmap 32bit)
JPEG
Planned outputs on future versions: JPEG2000, TGA and RAW.
Planned features:
Output separate alpha channel < (being tested)
Scaling and Rotation of sprites < (mipmaps pseudo implemented)
Faster alpha key generator (currently not optimized)
Automatic atlas resizing (will be optional) < Done – It’s called AutoSize!
Multiple pages per directory (to be implemented)
Parameter for output path. < Done – Full parameter support through console.
x86 and x64 binaries. < Done
Bugs and (are?) Features
Feature requests and bug reports are welcomed and encouraged. If you would like to support further development of this tool, or if you’ve found it invaluable in your work pipeline, please consider a small donation. You can contact me or click directly on the Donate button.
Why is it called MonoPack?
Originally intended for the Monkey and Monkey-X community, Mono comes from Monkey in Spanish. The rest requires no further explanation! – Needless to say this application is open to all communities and everyone’s suggestions are welcomed.
Obtaining the goodies
If you’ve made it this far, it’s only fair I hand you over the download link:
I’m starting to believe the best idea for a chinese lathe, as a first mod or project, would be to replace all threaded parts with proper ones. This is not the first stripped thread on the lathe… And rest assured, any time a thread strips, you lose at least half a lathe – functionality wise.
Actually scrap that, the best idea is, if you have the option, not to buy chinese. Buy old iron instead, problem is finding an old lathe that doesn’t have massive wear and isn’t missing most of the parts… So you might need some luck there.
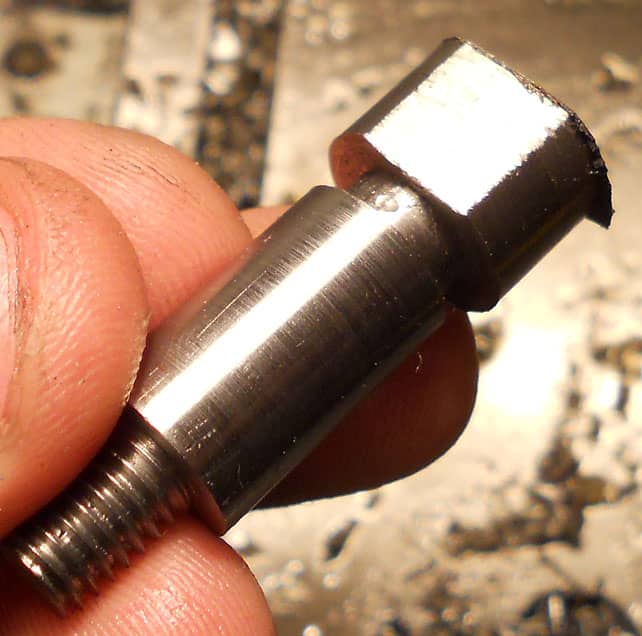
Was it made out of rebar? or butter?
Dat oiler.
Discussing the problem
Since I don’t have any oiler inserts and I don’t plan on making any, the idea of making a new part from scratch seems sketchy as I wouldn’t have a way to seal the oil and prevent gunk from getting inside the port.
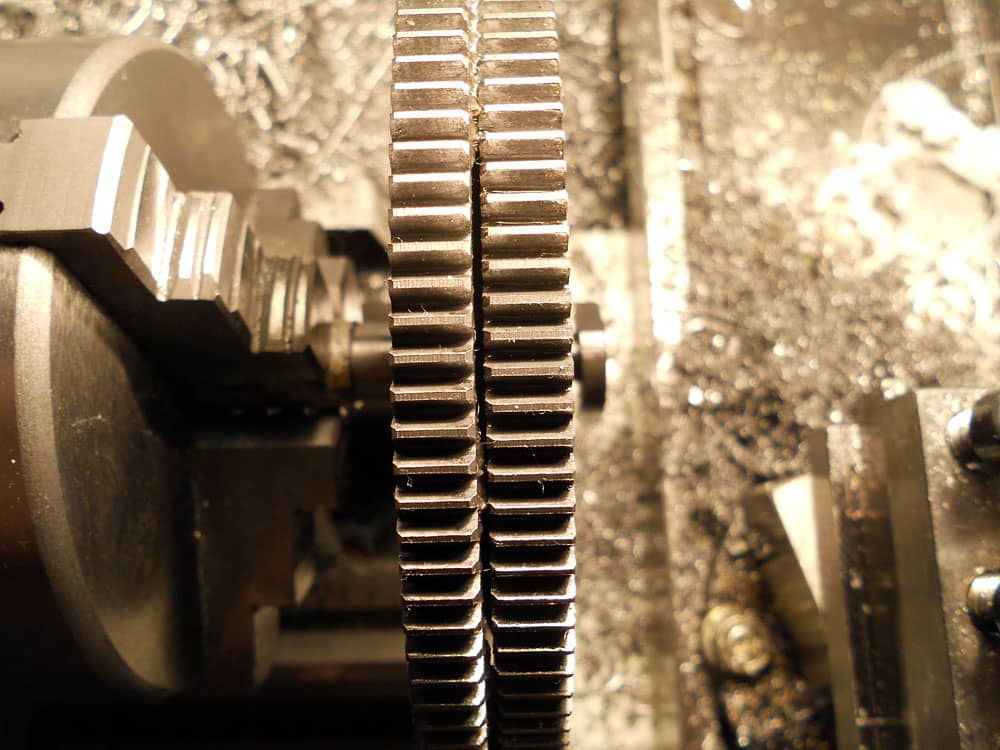
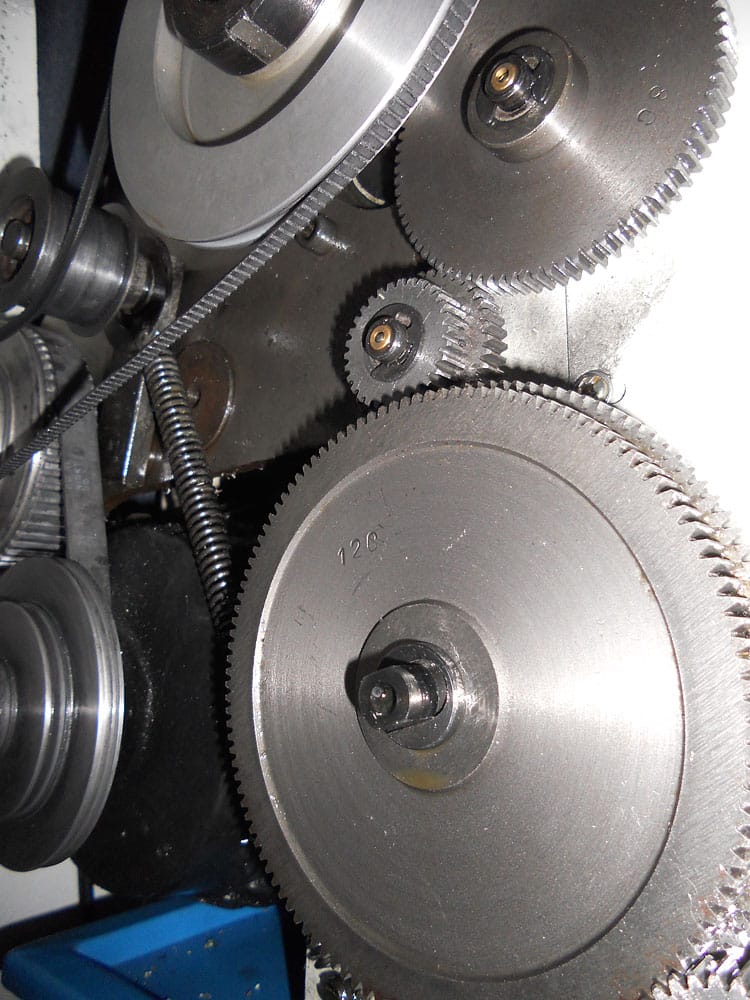
This part is the shaft for the double transmission gear on the banjo, it transmits power, through the two A and B gears, to the gearbox for power feeding, threading, etc. Without it, you only have half a lathe.
The oil port acts as a valve, allowing the oil to only escape through the hole on the shaft, which it does by centrifugal force, allowing a layer of oil to remain in between the bushing of the gears and the shaft itself, reducing friction and wear. Without the valve, very little oil would get onto the shaft and most would fall off the oiling port.
Thankfuly the T-nut didn’t strip, but the thread was slightly damaged and had to be dressed with a tap, it’s been since case-hardened and awaits installation.
Two Options
Either I turn down the stripped M6 portion, counterbore the shaft and press a new stud with an M6x1 thread or I make the whole part from scratch using mild steel (I would like to use brass, but I don’t currenly have any stock big enough). Of course we only have a square portion to chuck onto, that means moving onto the 4 jaw chuck and busting out the indicator. One problem though the square part wasn’t milled exactly 90°, it’s all over the place.
The second option, make the part from scratch out of mild steel and figure out a way to fashion an oiling port.
Contrary to what I thought, and as I’ve mentioned, the square portion was milled flat from round stock, this part did not start life as a square stock. Makes sense, since interrupted cuts are slower in production and you can trade in a bit more material loss over higher productivity time, which means more income in general… Of course, if you use crappy materials, it doesn’t matter how you make the part… it’s always going to be crappy.
Given the slot near the square portion is to engage another part, which acts as a washer and for lack of better words, a sort of thrust “bearing” or “clamp” which also helps lock the parts in place, the head of the part MUST be square, otherwise the other part would also have to be remade since it’s slotted to fit and slide through the square portion.
Critical Dimensions:
The shaft is 10mm and pennies, turned down for a perfect sliding fit on the gear train (Currently 10.05mm). The threaded portion is M6x1mm however originally it wasn’t long enough to engage all of the threads on the T nut (not shown on pictures). So while I will duplicate the original part, I might make a second part, with my own design. Of course if I could have it my way I would use at least M8 for this, M10 would be ideal.
Making due with what you’ve got.
For a temporary part, I’m thinking I could skip the oiling (maybe add oil “holes” on the shaft, not through holes, just small pockets throughout to contain oil) and use a slotted head on the end, to fasten the part. This would work perfectly on the short term while I come across better stock or a better design.
Thinking in advance…
Now I can’t help but wonder, should I make spares of every part that’s been damaged?, or should I trust my materials and skills?. For now, let’s make a working part, once I’ve got power feed and threading capabilities back, I might turn spares. This is not the first time a thread strips on this lathe.
Gettin’ busy!
Test fitting on the rough blank after careful turning it down to size, the gears turn freely with ever so slightly drag (excellent!)
Filed the flats, parted with the chop saw. Time to deburr!
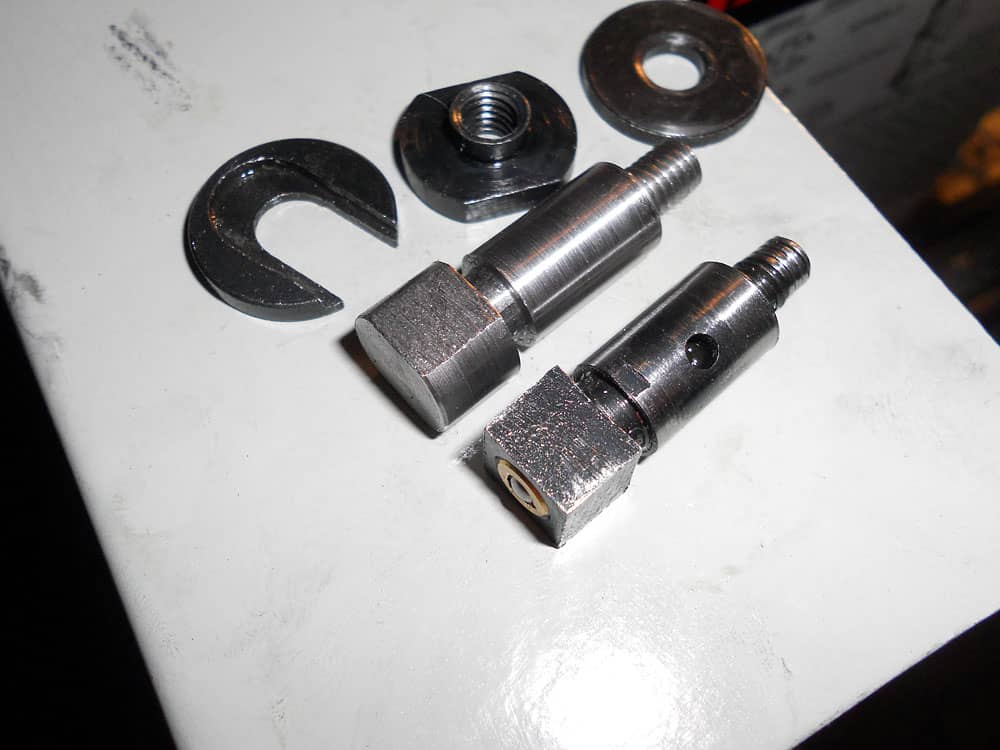
The almost finished part, next to the original. There’s no real need for all faces to be flat, two are the absolute minimum you need, two is what I did. I faced it on the lathe and deburred the remaining edges with a file.
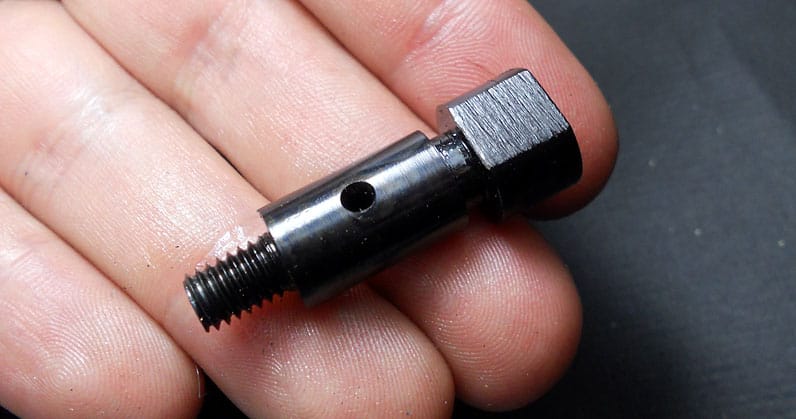
The finished part, Bored the inside, drilled the oil port. Case hardened and black oxide finish. Ready to install!
All setup and working! Let’s hope it lasts. A new T nut is in order though.
Final notes
All in all a simple project, but shows how even the simplest parts can fail -one way or another- and cause you a lot of trouble.
Once I figure out a simple way to make oiler inserts I’ll most likely be adding one to the new shaft. Next time I will probably use a better material, cold rolled steel isn’t ideal, but it’s what I had. I will probably make spares anyway, including new T-nuts.
I have an idea for a different style oiler (gravity fed, bottle style) but out of cheap aluminum, I would ideally use glass with aluminum caps but at the moment I don’t have a source for small diameter glass tubing (8mm or so) and cutting it might end up being problematic.
Of course there isn’t a lot of space available and it has to be sturdy and reliable. Ideally the originals could be ordered (I really can’t do that anymore) or made to look alike, but they are rather complicated due to the fact they use a tapered spring and require flat milling on the bore of the part, the right sized steel ball bearings, etc..
Either way, rest assured something cheap and simple will be devised!
This is a basic implementation of PHP’s strip_tags() for PureBasic, it’s not fully optimized but it’s fast enough for most applications. It doesn’t use native string manipulation functions, instead it parses through each character of the string.
Naturally it’s going to be faster than using REGEXP, but not as flexible. Lots of room for improvement, but for now it is what it is!
Procedure.s strip_tags( *szInput.character)
	Define.s szOutput

	If (*szInput)

		Repeat

			If (*szInput\c = '< ')
				;Strip markup tags (completely)
				Repeat
					;-ToDo: add support for selective tag stripping!
					*szInput + SizeOf(CHARACTER)
				Until *szInput\c = '>'

			Else

				;Not a tag?, process for entities or send to output directly
				Define.c ThisCharacter = *szInput\c
				Select ThisCharacter
					Case '&' ;Entity
						*szInput + SizeOf(CHARACTER)
						If *szInput\c = '#'
							*szInput + SizeOf(CHARACTER)
							Define.s szEntity
							Repeat
								szEntity + Chr(*szInput\c)
								*szInput + SizeOf(CHARACTER)
							Until *szInput\c = ';'
							szOutput + Chr(Val(szEntity))
						EndIf
					Default
						szOutput + Chr( ThisCharacter )
				EndSelect

			EndIf

			*szInput + SizeOf(CHARACTER)
		Until *szInput\c = #Null
		ProcedureReturn (szOutput)

	EndIf

EndProcedure