Leaky head?, Low flow rate?, read on…
Most of mid to low end espresso machines share pretty much the same pump and block assembly with very few differences, there are in fact just a few major designs out there most of which are aluminum/brass based and manufactured in China, however that doesn’t neccesarily make them bad.
In all inexpensive units (and some expensive units sold as “professional” but they’re actually a product of marketing bullcrap) the group head has a spring valve that opens when enough pressure builds on the head, this happens when the pump is turned on and it’s there to prevent water leakage. Some better units will use solenoid valves instead, which also allow to set the flow rate in some cases.
The passive valves used on inexpensive units require a clean surface to sit on, much like an engine valve does. The reason espresso heads can leak is simply because of an uneven mating surface (dirty valve seat or dirty valve) it doesn’t have to be a faulty part so if your machine leaks, don’t assume you’ll need rare / expensive spare parts to fix it. If you’ve taken good care of your unit chances are it needs a slight clean up and polish.
Like I said, this gparticular uide is mostly for inexpensive machines, I don’t have experience with high-end units as I’ve never had the pleasure to work with them.
Alright, bring it on!
To proceed, remove the water reservoir, portafilter and any loose parts such as filters, trays, etc. Tip the unit over, I use bubblewrap on the countertop to prevent scratches. In my case I had to remove the bottom cover (plated steel) which was held in place with 4 security torx screws.
Identify the type of head/block assembly, mine has a 12MM nut which holds the diffuser and forms part of the valve assembly itself. Other heads may use a notched nut or similar assembly allowing for a flat-head screwdriver to be used. Go ahead and remove it.
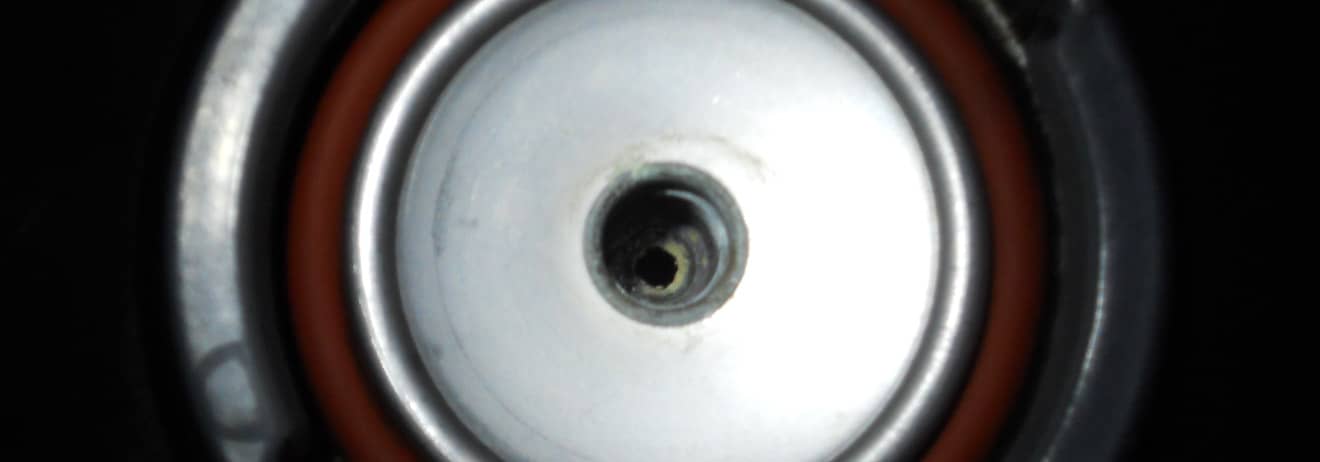
A view into the brew head before cleaning it, you can clearly see it’s become obstructred. The valve was in even worse shape!
The valve is often spring loaded and has a silicone seal / head. This is where some of the sediment build-up occurs and prevents it from sealing the boiler properly. But most of the build-up occurs on the valve body, which is often (but not always) brass, on more expensive units you may also find stainless steel parts.
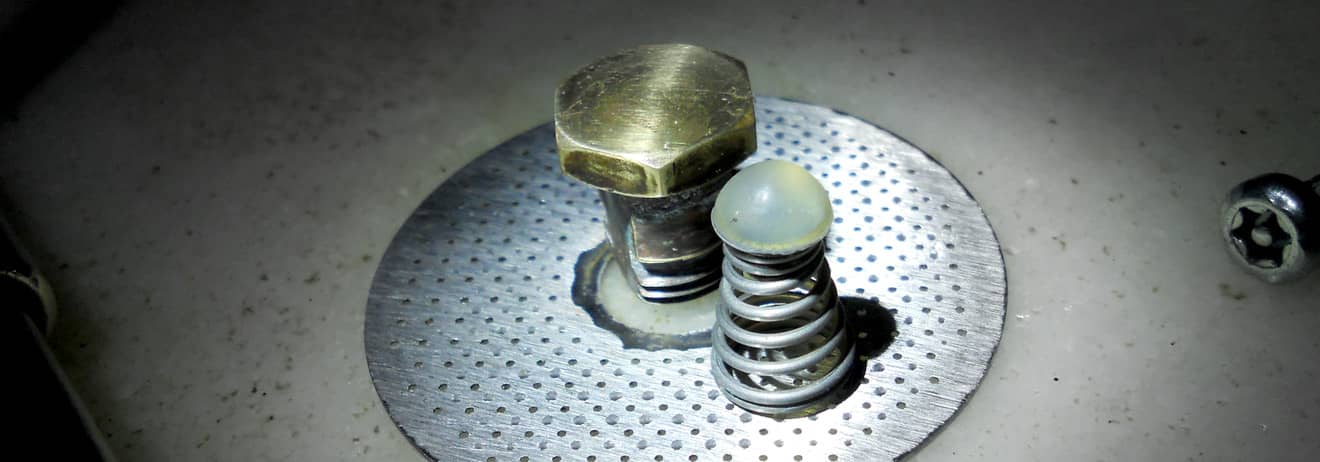
Once you’ve removed the nut pull out the spring if it didn’t come out on it’s own, now that the entire valve assembly has been taken apart, use a flashlight to look into the valve body, you’ll probably find the opening to the boiler is slightly (or severely) restricted with build-up.
If there’s no way to remove the bottom of the unit, you’ll need to work with a mirror to look into the boiler.
Valve assembly after clean-up.
To proceed with the clean-up of the valve body you’ll want to use ~300 grit sandpaper (emery cloth) and then 600 to finish off. You could use your Dremel / rotary tool with a fine brush attachment used for polishing brass (don’t use any compounds, just water) but you have to be very careful not to damage the threads or the valve seat, if you increase the original diameter there’s a chance the valve could pop in and float inside the boiler, allowing all of the boiler contents to spew out and it would never seal again forcing you to replace the entire valve head which may end up costing quite a bit of money and may not even be worth it on inexpensive units. Another possibility is for the bulb to catch and get stuck, so beware of the Dremel and abrasive tools.
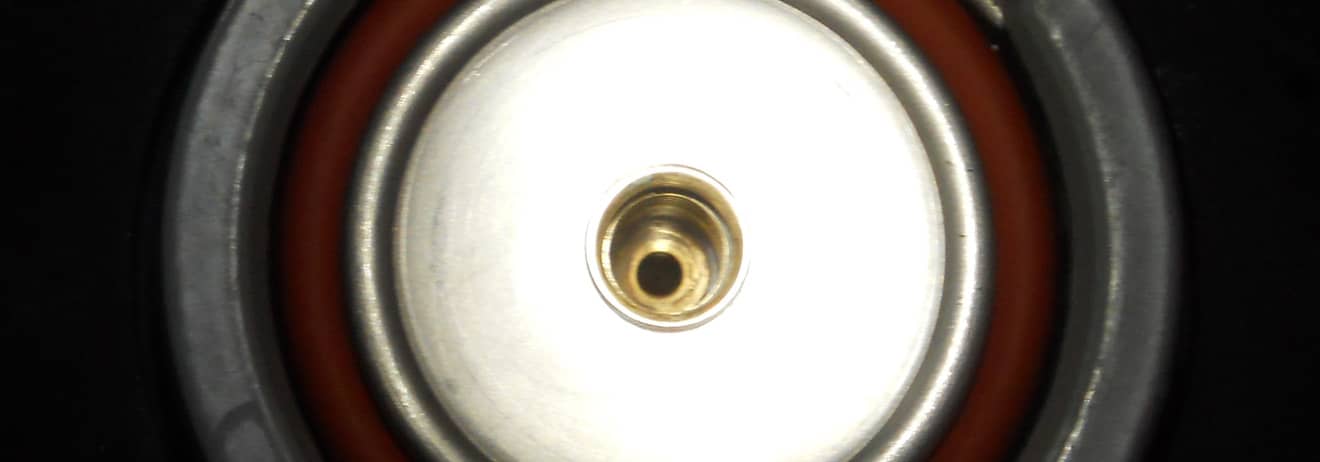
After cleaning and polishing, it looks brand new!
If you want to make sure all the surfaces are neatly cleaned up and polished, you can use an old lead pencil as a former to wrap a piece of sandpaper around, tapering the top into a cone and then inserting it inside the valve body (with water) you’d proceed by twisting it a few times, removing it, inserting some cloth or paper towel wrapped around to clean up the valve and then take a look inside with a flashlight, repeat until it’s all nice and polished, specially the valve seat.
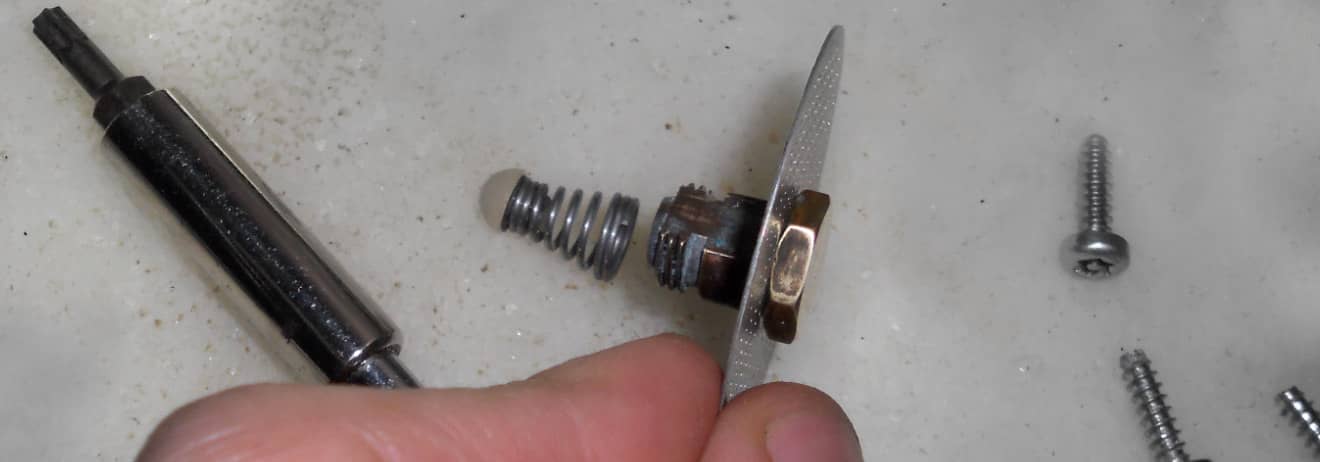
The silicone valve in my case had a lot of build-up but was easily removed by hand, don’t use any abrasives on it and try not to scratch it in any way.
Now that you’ve cleaned it all up, go ahead and add some water with the unit standing on it’s usual position and give it a few flushes, any loose pieces of build-up should come out, as well as anything you’ve unwillingly introduced while cleaning and polishing the valve body.
This is how the assembly goes, valve bulb/head pointing up.
If all looks good, go ahead and assemble the valve back to it’s original state. The silicone valve goes facing up into the valve seat, make sure the spring is nice and clean as well as the silicone valve head. If you see any damage on the silicone it’s time to replace the valve or come up with a makeshift solution…
Once it’s all assembled, torque the nut down making sure your diffuser disc / plate is in the right position and turn the unit on, give it a nice flush.
In my case the diffuser was slightly blocked so I had to clean it up with a needle and lots of patience before I installed it, This procedure made heaps of difference. Basically my espresso was not only leaky but also had low flow rate and it sputtered a lot making it difficult to obtain a straight shot with good crema.
Next in my list would be to access the pump to see if there’s a pressure relief adjustment and go ahead to calibrate it up to 9BAR at the head, that however is going to be a whole ‘notha quest for me. In that event I may probably end up refurbishing the pump as well.
Hopefully this guide has been of use to you!
And as you know, don’t send your machine to the store… A good barista fixes his/her own espresso!
Have a good one,
Gus